Titel : Add a Slider to Blogger
Link : Add a Slider to Blogger
Add a Slider to Blogger

Life can get pretty darn busy at this time of year. I had to take some time off posting just to get my grad school work done as well as my job. There's a ton of new tutorials I have in my back pocket but just haven't had time yet to do the work. But, my paper is done for school and I'm now relaxing in a snow storming weekend.
What I didn't expect was that I would be spending hours trying to find a good image slider for Blogger that didn't run into weird problems or wasn't too complex to implement. Image sliders are very cool but are implemented in so many different ways - typically in Flash or Javascript. In this case I had to work through about four different free sliders to find one I liked or that worked right. Blogger does have a Slideshow gadget, but it doesn't have any real customizable features.
Let's get started. The Image Slider template I chose is from a company called Menucool.com and offers a free slider framework. You can view a sample of it in action by clicking on the image in the upper left of this post. The part that sold me on it was the fact that it didn't require JQuery script code in order for it to be implemented. That's good for us because it reduces the load time for your blog and is easier to install (note that easier is relative here - it is still a bit of a trick to get it setup correctly).
Uploading and Installing the Main Script
The main Javascript code for Menucool requires you to install some javascript code somewhere. Well, as you know Blogger doesn't have a place to install a file. You could extract the script and embed it into your template. But, I like to add it to Google Sites as a file then reference it. Your first step is to go to the Menucool.com Javascript Slider page. From there scroll down a bit to download the image slider code. All we want right now is the main Javascript file - click on the Download button:
The file is going to be in zip format. So, depending on your system you may need to download an unzip utility. Once downloaded and unzipped you should see something like this:

Navigate to the folder called jsImgSlider\jsImgSlider\themes\1 - this is where you will find your code file entitled js-image-slider.js:

Now, you'll need to install this file on a visit external site somewhere.
IMPORTANT UPDATE: If you have a custom domain name (not [blogname].blogspot.com) then don't upload the .js file to Google Sites (please see the Addendum 1) and jump down a few paragraphs to Adding the Nav Button!! This next section only works for .blogspot.com domains.
As I noted I use Google Sites for this. I'm not going to repeat my tutorial on how to install a file in Google Sites. Just take a look at my MP3 posts on installing a file. You'll want to upload the js-image-slider.js file to your Google Site exactly like an MP3 file. Follow the steps in Add an MP3 File to Blogger - Part 1 and Part 2 of how to upload a file to Sites.
Once your file is uploaded you'll want to find the full link to it as I did in the MP3 tutorial by right-clicking the down arrow on the far right and choosing 'Copy Link Location':

https://sites.google.com/a/bloggertipspro.com/myfiles/mp3/js-image-slider.js?attredirects=0&d=1 Be sure to remove the '?attredirects=0&d=a' part. You can also change the https to just http.
Add Links and CSS to Your Blogger Template
Now you're ready to install the scripts and layouts to your Blogger template. First step is to add this line you just saved to your template's HTML with the script tags added - be sure to change my URL to yours:<script src='http://sites.google.com/a/bloggertipspro.com/myfiles/mp3/js-image-slider.js'/>
Go to the Blogger main menu and choose to Edit HTML in your Template:

At the very top of the Template add your script line above like this just after your title code. Be sure to save your Template:

Adding the Nav Button
Now you have the image slider code ready to be used. One part of this code requires a simple image upload to your blog - the navigation buttons. This file is called bullet.png - you can see it in the unzip file list above when we got the javascript file. Copy this file from the unzip list and add it to any post in your blog as an inserted image and save the post. Then, just go into the HTML of your Post and find the image link like this:

Copy that link code from your post and save it in a word processor or text editor. You want this for later. Go ahead and delete the image from your post. Don't worry, Blogger keeps all images even after your delete the post image.
IMPORTANT: follow the very same steps when adding your banner images as well. Add them to a post, save the post, copy their links and then delete the images. In my case I have three 900px by 120px images that I added to a post - which you can see here. I could delete them - it wouldn't matter - but I left them for you to see.
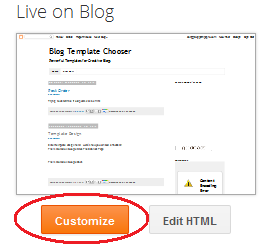
Next step is to add the right CSS code to format your images. In my example I'm using banner images that are 900px wide by 120px tall. You can modify the CSS for any image size. The CSS code below will be setup for that size. Next step is to go into your template Customize section:

/* http://www.menucool.com */

#sliderFrame {position:relative;width:900px;margin: 0 auto;} /*remove the "margin:0 auto;" if you want to align the whole slider to the left side*/

#ribbon {width:111px;height:111px;position:absolute;top:-4px;left:-4px;background:url(ribbon.png) no-repeat;z-index:7;}

#slider {
    width:900px;height:120px;/* Make it the same size as your images */
 background:#fff url(loading.gif) no-repeat 50% 50%;
 position:relative;
 margin:0 auto;/*make the image slider center-aligned */
    box-shadow: 0px 1px 5px #999999;
}
#slider img {
 position:absolute;
 border:none;
 display:none;
}

/* the link style (if an image is wrapped in a link) */
#slider a.imgLink {
 z-index:2;
 display:none;position:absolute;
 top:0px;left:0px;border:0;padding:0;margin:0;
 width:100%;height:100%;
}

/* Caption styles */
div.mc-caption-bg, div.mc-caption-bg2 {
 position:absolute;
 width:100%;
 height:auto;
 padding:0;
 left:0px; /*if the caption needs to be aligned from right, specify by right instead of left. i.e. right:20px;*/
 bottom:0px;/*if the caption needs to be aligned from top, specify by top instead of bottom. i.e. top:150px;*/
 z-index:3;
 overflow:hidden;
 font-size: 0;
}
div.mc-caption-bg {
 background-color:black;
}
div.mc-caption {
 font: bold 14px/20px Arial;
 color:#EEE;
 z-index:4;
 padding:10px 0px;/*Adding a padding-left or padding-right here will make the caption area wider than its background. Sometimes you may need to define its width again here to keep it the same width as its background area (div.mc-caption-bg).*/
 text-align:center;
}
div.mc-caption a {
 color:#FB0;
}
div.mc-caption a:hover {
 color:#DA0;
}


/* ------ built-in navigation bullets wrapper ------*/
div.navBulletsWrapper  {
 top:130px; left:400px; /* Its position is relative to the #slider */
 width:150px;
 background:none;
 padding-left:20px;
 position:relative;
 z-index:5;
 cursor:pointer;
}

/* each bullet */
div.navBulletsWrapper div
{
    width:11px; height:11px;
    background:transparent url(https://blogger.googleusercontent.com/img/b/R29vZ2xl/AVvXsEgAxTVmc8MjyjjlEw-tuQTWznwK4CPh9nUVTHUosafGvzlsUc3aDDT8UyNe-RIaE9-Xy8qyo3-3_8AuOMmxRG24EqCXZk3bTb4w819ZrpyCTT_X93imZhyphenhyphenu4AXioOwGxvzvLVxB8kM3OxMr/s1600/bullet.png) no-repeat 0 0;
    float:left;overflow:hidden;vertical-align:middle;cursor:pointer;
    margin-right:11px;/* distance between each bullet*/
    _position:relative;/*IE6 hack*/
}

div.navBulletsWrapper div.active {background-position:0 -11px;}


/* --------- Others ------- */
#slider
{
 transform: translate3d(0,0,0);
    -ms-transform:translate3d(0,0,0);
    -moz-transform:translate3d(0,0,0);
    -o-transform:translate3d(0,0,0);
}
Find the part in the code near the end that references the 'div.navBulletsWrapper' and the part that says 'background:transparent url' - paste in the bullet.png image link you saved earlier to replace the one here. Once you've pasted in this CSS code be sure to hit the orange Apply to Blog button!

Ok, you're just about set. The last part is to have your images ready for the slider. So, if you're using this same tutorial - try images of my sample size first. If you want to alter the sizing - find the CSS section entitled '# slider {' in the code above. You should see the slider width and height that you can adjust for your images. Also, adjust the '#sliderFrame {' section to the width as well if you want. You may need to adjust the 'div.navBulletsWrapper {' section too to move any banner test positioning.
Place the Images in the Slider HTML
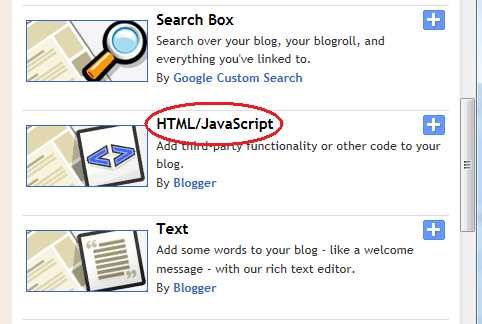
Your final steps are to go into your Blog layout section - choose the main manu Layout and Add a Gadget:
Choose a standard HTML/Javascript gadget like this:
Next, you'll want add the HTML code that will spin the banner images. A couple of notes to change in the code below - a) be sure to copy your banner image links in, b) you can add as many images as you want - just add additional img tags, c) alter the banner text and links to what you want, d) alter the last caption to go to any link you'd like, e) add links with a href tags if you want a clickable image:
<div id="sliderFrame">
        <div id="ribbon"></div>
        <div id="slider">
            <a href="http://www.bloggertipspro.com/" target="_blank">
                <img src="https://blogger.googleusercontent.com/img/b/R29vZ2xl/AVvXsEgLaEqs96qAvv4yDkRnuCGLJRpwQF7oREKDB-YPkCT_WJAKuFFKzv-Z7SR6y582OcQkPP2_q-xW2n6qKJyGmiB6LZmq2IOAw7U79wVPsDRlr3ANkNb1l5rwjX7CKlfTAr9eBHZto8DF32xV/s1600/aimage1.jpg" alt="Sliding Images for Blogger" />
            </a>
            <img src="https://blogger.googleusercontent.com/img/b/R29vZ2xl/AVvXsEhGo1CbhaS7aOn11fFTO_FMoar3EAhYGyvaZFg2lyGvPZGwdxCT8cePSxPsO-STOqi9KStkcqGAd3T9glbiHKrORllNYvTifnlzG6D811RsIB3iXOkU_1AwLkGXNuAq-g2hErFjvVwjvhQ0/s1600/aimage2.jpg" alt="Multiple Transition Options" />
            <img src="https://blogger.googleusercontent.com/img/b/R29vZ2xl/AVvXsEiBU6j90QXU4H6JevThHtqygQ50m__xbhxoQtG1mDoZRLELu0q68iSf2wjdeqwTx1IIEj58a4rHB7xd-8DveJIGe4ugPkuEIuElKujMRjI-V-KUnhQzkZgrZSt0CABmL3EkBpcyDFk5mePp/s1600/aimage3.jpg" alt="Full Instructions at BloggerTipsPro.com" />

        </div>
        <div id="htmlcaption" style="display: ;">
            <em>HTML</em> caption. Link to <a href="http://www.google.com/">Google</a>.
        </div>
 </div>
You can see my image links above where I pasted them in. Go ahead and save your gadget code and position it where you want. I've placed my example near the top - but, you can be creative and add the code where you'd like:

That's it - be sure to save your layout! Your rotating slider images are ready. If you go back to the Menucool.com site you can find more ways to adjust the slider properties and do some more creative things. Enjoy - here's the link again to my sample blog: http://statichomepage.blogspot.com
Addendum 1- Fixing the Javascript for Custom Domains
Apparently, Google Sites wraps the Javascript code above in HTML if your domain is not .blogspot.com but a custom one just like BloggerTipsPro.com. Rather than added an external link, all you need to do is to copy the Javascript code directly into an HTML widget. Just add a new HTML widget anywhere on your layout. Then, open the file 'js-image-slider.js' in a text editor and copy the code into the HTML widget surrounded by the script tags like this:<scripttype='text/javascript'>
var sliderOptions=
{
sliderId: "slider",
effect: "series1",
effectRandom: false,
pauseTime: 2600,
transitionTime: 500,
slices: 12,...lots of code here......getElement:function(){return K(j.sliderId)}}}
</script>
You can see how I pasted the code here:

Go ahead and save your gadget code and you should be good to go!
Addendum 2- Allowing Your Slider Only on the Home Page
This part is a bit tricky and you'll have to be sure to backup your template in case of errors. There was a question in the comments about how to limit your slider only to the home page. Now, if you have a Static Home Page like my tutorials before then what I'll show you is the way to do it. However, if you want to show the slider only on the Blog Posting main page you'll have to change a couple of things.The key to doing this is to add code to your template that will only show the HTML widget above when a certain page type and page name loads. This isn't a great idea because now you'll have that page name embedded in your code - REMEMBER THIS - if you ever change the page name you'll have to go back into the template and change the code!!!
You'll need to find the HTML widget in your Template by expanding it and searching for it. Here is how I found my code in the Blogger Static Home Page template and example for this:

<b:if cond='data:blog.pageType == "static_page"'>
<b:if cond='data:blog.pageTitle == "Blogger Static Home Page: Home Page"'>
These lines are checking to see if the page is first,a static page, then, trying to compare the page title. In this case, if the page is of type static_page and the title is 'Blogger Static Home Page: Home Page' then show the slider - otherwise, ignore it. Remember to add the two </b:if> statements at the end. Your page types (pageType variable which can have the values 'item', 'archive', 'static_page' or 'index') and Titles will vary - take care to work through this.
Thus Article Add a Slider to Blogger
Helpful Tips Add a Slider to Blogger,hopefully can provide benefits to all of you . Okay , so this time posting helpful tips.
0 Response to "Add a Slider to Blogger"
Post a Comment